
Easy and very stylish! A coat hanger for the hallway made from copper pipes. It’s a straightforward and enjoyable task that you can do on your own step by step.
Keeping the space organized is very important and to do this you need items that will assist you, which will be simple for you. Just like this coat hanger with wooden shelves, very useful and attractive. It is made from copper pipes and you can create it yourself with little effort – explore the DIY project step by step.
Why create a coat hanger with pipes?
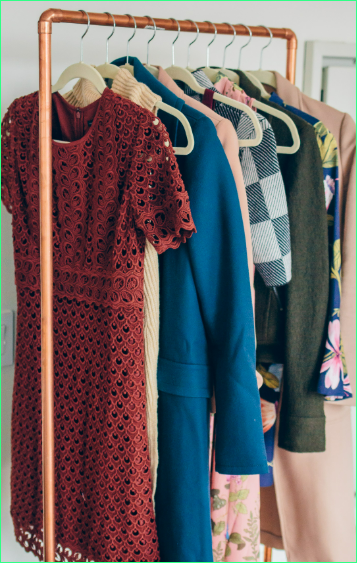
Copper pipes have become an important part of the decoration in our areas, especially those in an industrial look. They can be seen on shelves, shelf supports, and shelves, on coffee tables, magazine holders, and more. Today we will show you a fantastic DIY idea to use decorative copper pipes: make a coat hanger for the hallway. This way you can organize the entry to your home and place your shoes, coat, bag, and keys. Everything neat and tidy.
 Modern kitchens with the island and the uses you can give it
Collect everything you need
Making this wooden pipe and stand is not hard, but you will need a few tools and materials:
– Material:
- Straight copper tubes with a diameter of approximately 25 mm.
- Copper fittings or elbows
- Wooden planks: one larger one for the base and three smaller ones to make the shelves.
- Four industrial style wheels (with relative screws)
- Artificial grass (one piece the size of the base plate)
- Black acrylic paint
- Soldering board
- Paint remover
– Tools:
- Pipe cutter
- Pencil
- Blowtorch
- Subway
- Drill driver
- Drill Shovel
- Eyeglasses
- Welding gloves
- Brush
How to make this support
The copper pipe coat hanger has a fairly simple structure. It was made tall enough to hang coats and long dresses, and an additional bar was attached to secure the three wooden shelves. You can change the layout and measurements to adapt the project to your needs or preferences.
A tip:
Start by drawing a sketch of what the coat rack will look like, specifying the dimensions. This way you will know how many pipes and elbows you need and what each should measure.
ideas for painting the bedroom in two colorsCut the pipes
Measure, mark and cut the copper pipe according to your pattern to get all the parts needed to assemble the coat hanger. Use a pipe cutter to cut copper pipes. It is a very easy to use manual tool that allows you to make clean, burr-free cuts. This way you will avoid having to sand the edges of the tubes.
Weld the parts
After cutting all the pipes and preparing the joining elbows, it’s time to weld the parts. For this you will need to use a flashlight and a box.
- Before starting, clean the edges of the tubes very well and apply the paint stripper on the two parts you will be joining: the outside of the tube and the inside of the elbow. This is done to leave the copper free of grease, so that the solder slides better when soldering it.
- Protect yourself before starting welding with gloves and glasses.
- Assemble the pipes in the appropriate position and heat the welding area with the gun evenly.
- Apply tin wire by removing the lantern. The mold must be melted with the heat we give to the tube (not with the flame of the torch).
- Allow the solder to cool slowly on its own.
- Join all the pieces of the clothes hanger structure in the same way.
- Paint the pipes with black paint (you can leave them copper or choose any other color).
Prepare the pieces of wood
- Start by measuring and cutting the wooden board that will serve as the base to the appropriate size.
- Then place the wooden shelf in one of the corners, right where you will place it.
- Mark the position and diameter of the hole you need to make with the tube and tape measure and use the drill and bit. When you make the hole, you will have the mark on the base and so you will know at what point you will have to drill this wood.
- Use the shelf with the hole as a guide to drill the other two wooden shelves.
Paint the boards
To give the wooden planks a darker color, walnut was used, a varnish used to color wood and give it a dark, aged appearance. It is mixed with water in the desired quantity, depending on whether you want a lighter or darker tone.
- Prepare the mixture and color the boards with a brush.
- Paint the edges black for a more decorative finish.
Assemble the coat hanger
- Start by screwing the four metal wheels to the base of the coat hanger with the appropriate screws. In addition to being very practical for moving the coat hanger if necessary, the wheels give it a very industrial touch.
- Insert the tubes into the wooden shelves and fix them at the right height. To do this, drill a hole in the tube and insert a screw that comes out from both sides and acts as a cap to hold the shelf.
- Place the tubes at the base of the clothesline and place the piece of artificial grass to give it a more original touch.
¡Síguenos en Facebook para recibir nuevas publicaciones!
Seguir en FacebookLatest Posts Published

10 ways to save when you want to design a garden with a swimming pool

How to grow rose bushes at home

Sunflowers: care, how to plant them and when to water them

3 types of grills suitable for your garden or terrace

How to build a toy box at home

Ideas for furnishing your terrace with wicker furniture

10 Rustic Terraces You’ll Love

How to create beautiful and very simple floral compositions

How to cure brown leaves that appear on avocados?